Windows Subsystem For Linux (WSL)
Introduction
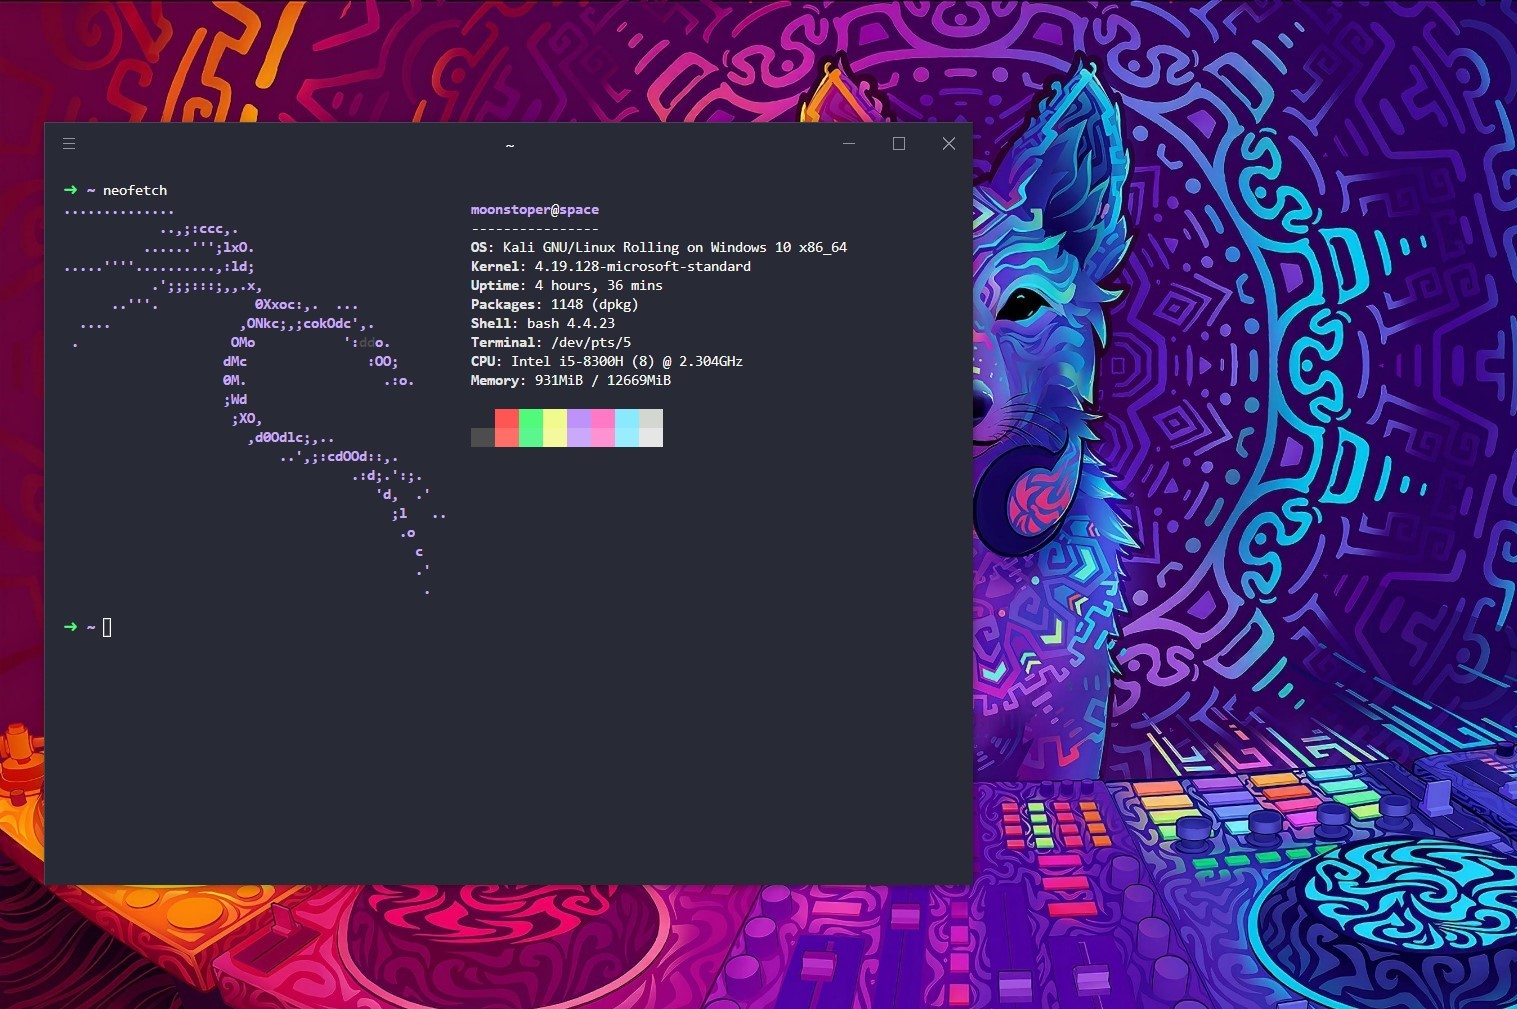
Windows Subsystem For Linux(WSL) is a GNU/Linux environment that you can use in your Windows operating system freeing you from creating dual boot or installing different virtualization software or emulator. It provides a basic command line interface / terminal with your preferred choice of linux distribution.
It’s a great option if you want to learn linux but don’t want to remove your Windows for some reason.
Pre-requisite
x64 - Windows 10 1903 or higher
ARM64 - Windows 10 2004 or higher
Pre-setup
First we have to enable features which are required by WSL.
Open Control Panel and the click on Programs and then Programs and Features
On the left pane click Turn Windwos Features On or Off.
Control Panel>Programs>Programs and Features
Enable Virtual Machine Platform and Windows Subsystem for Linux by checking the boxes in front of them.
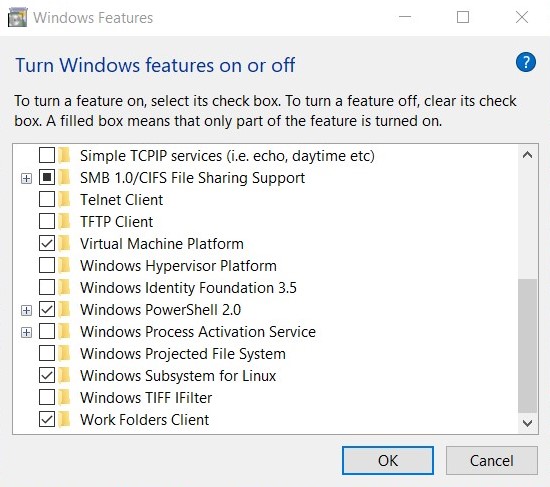
Restart your system after enabling them.
You can also enable these features from Powershell, just open Powershell as Admininstrator and type command given below:
dism.exe /online /enable-feature /featurename:VirtualMachinePlatform /all /norestart
dism.exe /online /enable-feature /featurename:Microsoft-Windows-Subsystem-Linux /all /norestart
Restart you system after the installation is complete.
Setup
Update to WSL2
Now we can we move to install a linux distro to use but before that you can install WSL 2 to get extra features and system stability.
To update to wsl 2 we have to install a file.
Download the file from the given link.
After installing open Powershell and type the following command:
wsl --set-default-version 2
Check wsl commands by typing:
wsl --help
If you don’t want to update to wsl 2 and instead want to keep wsl 1 skip the above step.
Opening your Distro
Now go to Microsoft Store and download a linux distro of your choice.Simply search for wsl program by clicking on start menu
and open it or by typing wsl command in Powershell. A bash like terminal will open with first time setup for username and password. After completing the setup you are good to go. Currently, there is no gui but you can easily install your favourite desktop environment and gui support.
I will cover this topic later in Full GUI Experience.
For Developers
As no gui is available, developers will face difficulty using it. Yes, there are cli editors such as nano and vim are present but are difficult to learn but they don’t provide features that are provided by IDE or even gui editors. Visual Studio Code comes to rescue it comes with WSL Remote Support so you just have to install Visual Studio Code in your Windows OS.
Download Page:
Visual Studio Code
Once the installation is complete open your linux distro and type the following command :
code
Installation of VS Code will take place. Make sure you have an active internet connection.
After installation VS Code will open. It will request to install an extension Remote-WSL accept the request and it will install the extension.
You can also manually install the extension.
Now you can do your projects inside your distro.
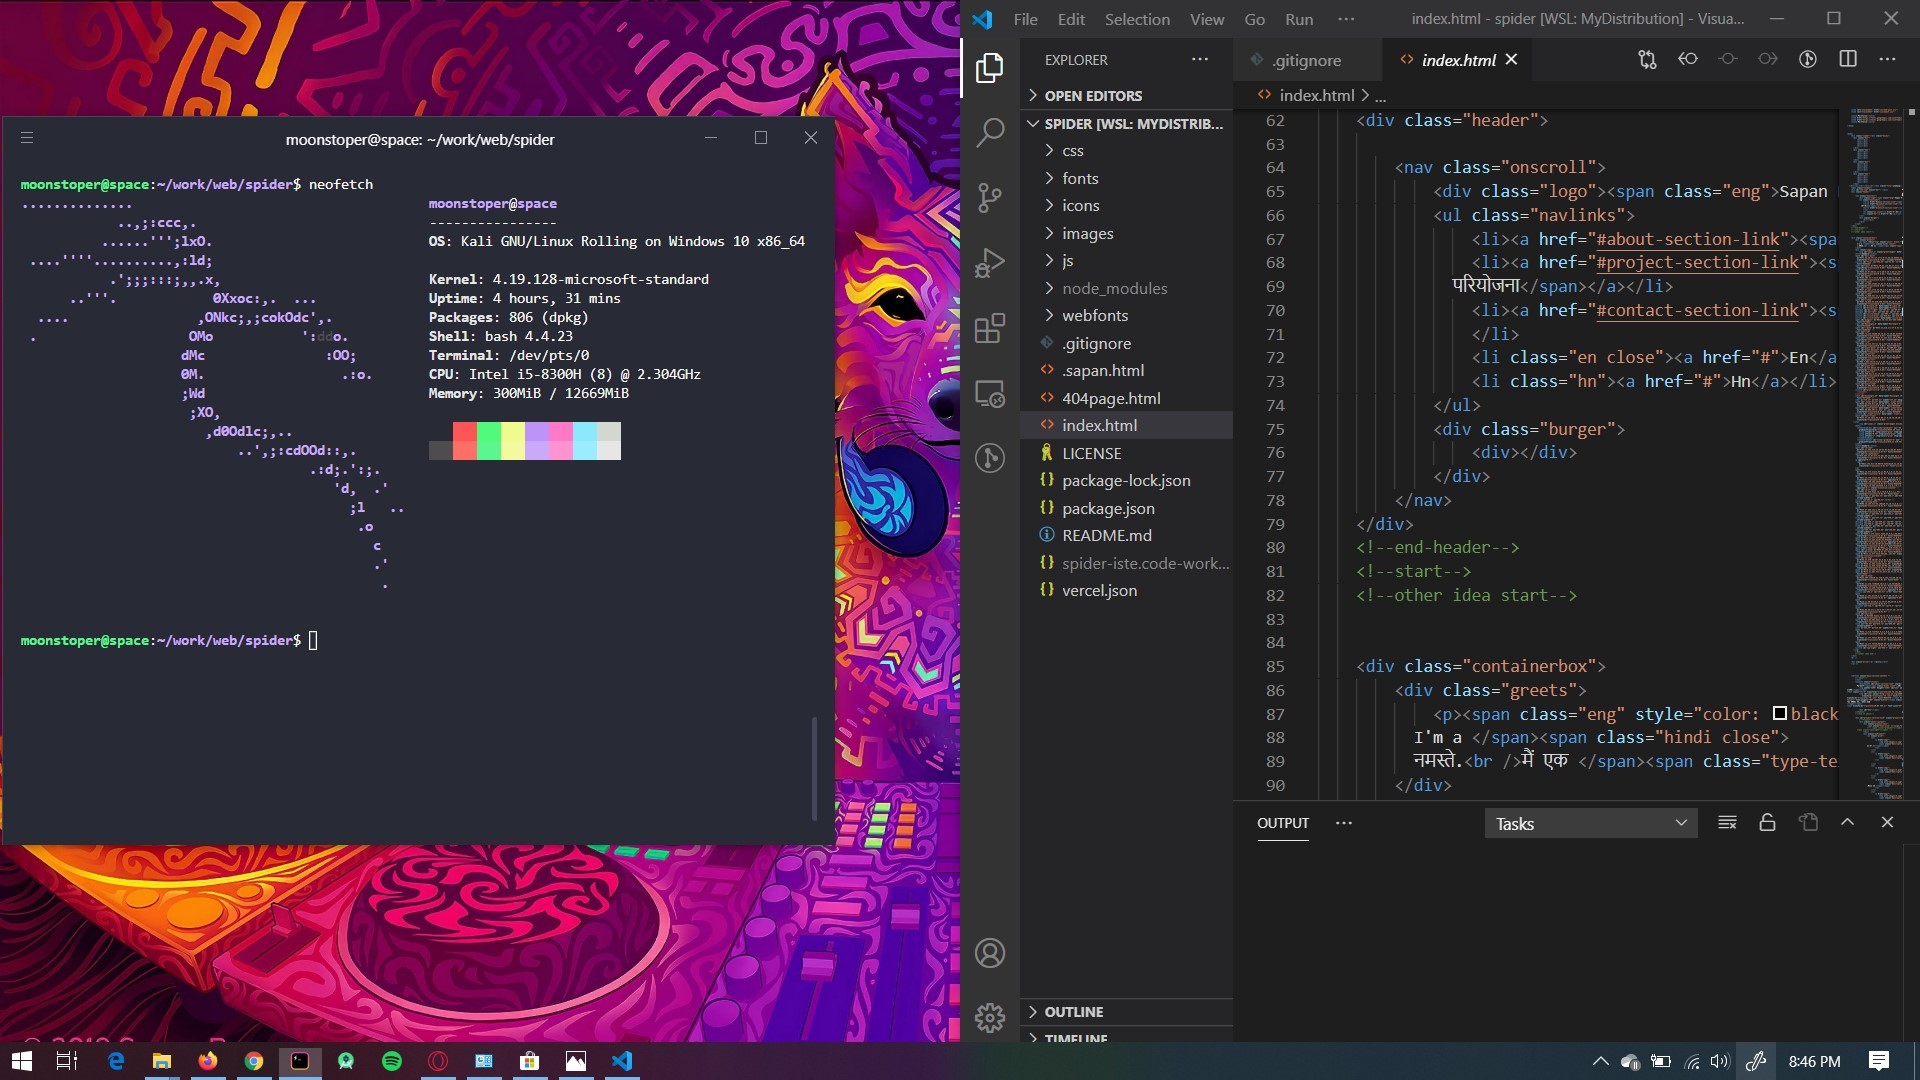
Docker support is also available if you want a container to test apps.
Nvidia CUDA support for Machine Learning enthusiast( Check installation guide, wsl 2 only).
Full GUI Experience
Before we move you must know that using a GUI desktop environment will decrease the performance of the system as wsl is a virtual machine running by Windows.
Method 1 (Using XRDP)
XRDP utilizes remote desktop connection of Windows to display your Linux GUI Open your Linux terminal. Type the following command to update your distro:
sudo apt update && sudo apt -y upgrade
Now we have to install xrdp:
sudo apt install xrdp
After the installation we have download a desktop environment. We will install a lightweight desktop environment XFCE4.
sudo apt install xfce4
To install XFCE4 Goodies / extra packages like wallpapers and applications
sudo apt install xfce4-goodies
Configure the XRDP:
sudo cp /etc/xrdp/xrdp.ini /etc/xrdp/xrdp.ini.bak
sudo sed -i 's/3389/3390/g' /etc/xrdp/xrdp.ini
sudo sed -i 's/max_bpp=32/#max_bpp=32\nmax_bpp=128/g' /etc/xrdp/xrdp.ini
sudo sed -i 's/xserverbpp=24/#xserverbpp=24\nxserverbpp=128/g' /etc/xrdp/xrdp.ini
Now we are going to create an alias to our command which we will use to start our remote desktop connection. First, go to the home directory of your distro
cd ~
Open .bash_aliases file
sudo nano .bash_aliases
Create an alias by any name (I am using Kali)
alias kaligui="sudo /etc/init.d/xrdp"
Now to start the xrdp just type:
kaligui start
And Click on Start on Windows Taskbar and Type Remote Desktop Connection. Open it in place of computer name type localhost:3390and in place of username type your linux distro username. When asked for password type the password of your linux distro.
Method 2 (X Server)
Open linux terminal nad update your distro :
sudo apt update && sudo apt -y upgrade
Now head to SourgeForge and download VcXsrv for Windows(other option : Xming for Windows).
VcXsrv will be our X server utility which will help us to display the Linux GUI environment.
Install the downloaded application.
Launch the application and set the configuration as given in the images below:
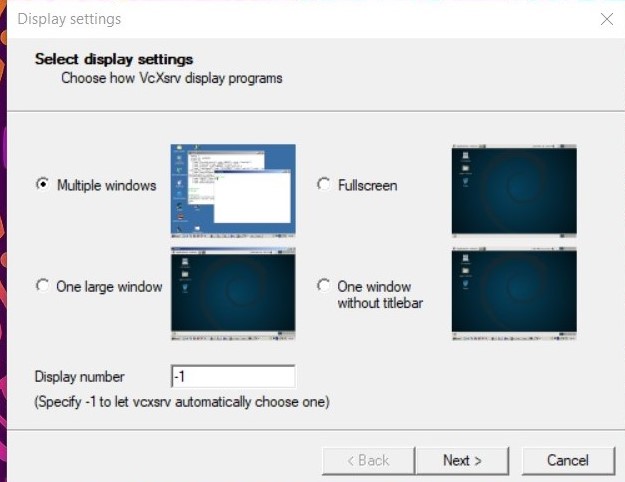
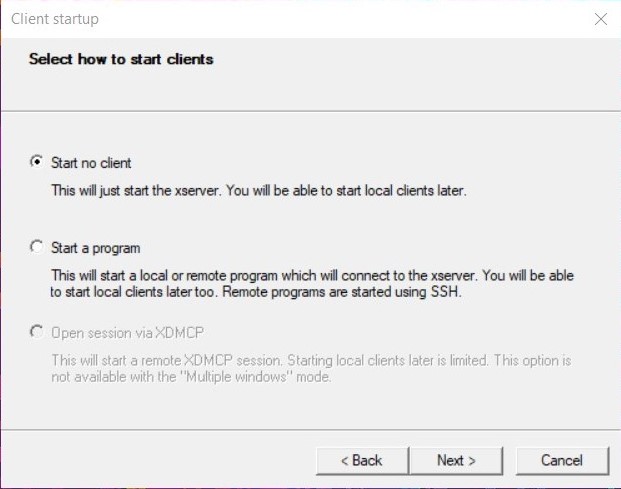
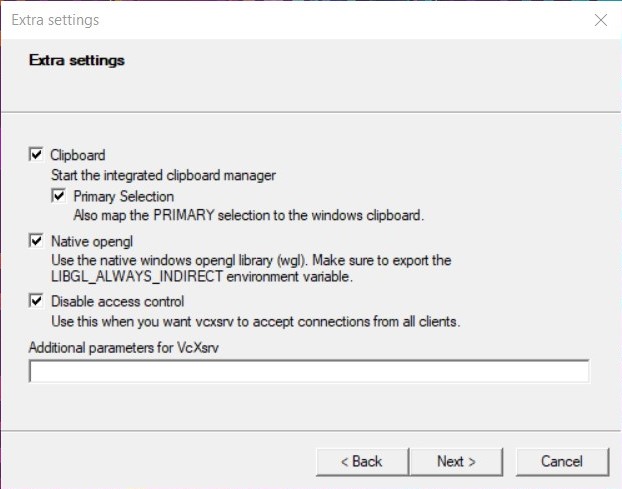
Finish the configuration. Don’t exit the application it needs to be in background whenever you launch any GUI application.
Now we have download to our desktop enviornment.
sudo apt install xfce4 xfce4-goodies
We will create an alias
#Home Directory
cd ~
#Open .bash_aliases
sudo nano .bash_aliases
#Create alias
alias xgui="export DISPLAY=$(cat /etc/resolv.conf | grep nameserver | awk '{print $2}'):0"
You can also add the following command to .bashrc file if you don’t want to create an alias and type it every time:
export DISPLAY=$(cat /etc/resolv.conf | grep nameserver | awk '{print $2}'):0
We will launch our launch desktop environment now. X server utility which we have downloaded must be also running and properly configured.
xgui
startxfce4
You can also launch an individual program rather than opening a full linux desktop which is not possible with Method 1. Just launch the GUI program as you launch any program from cli. Example below:
sudo termit
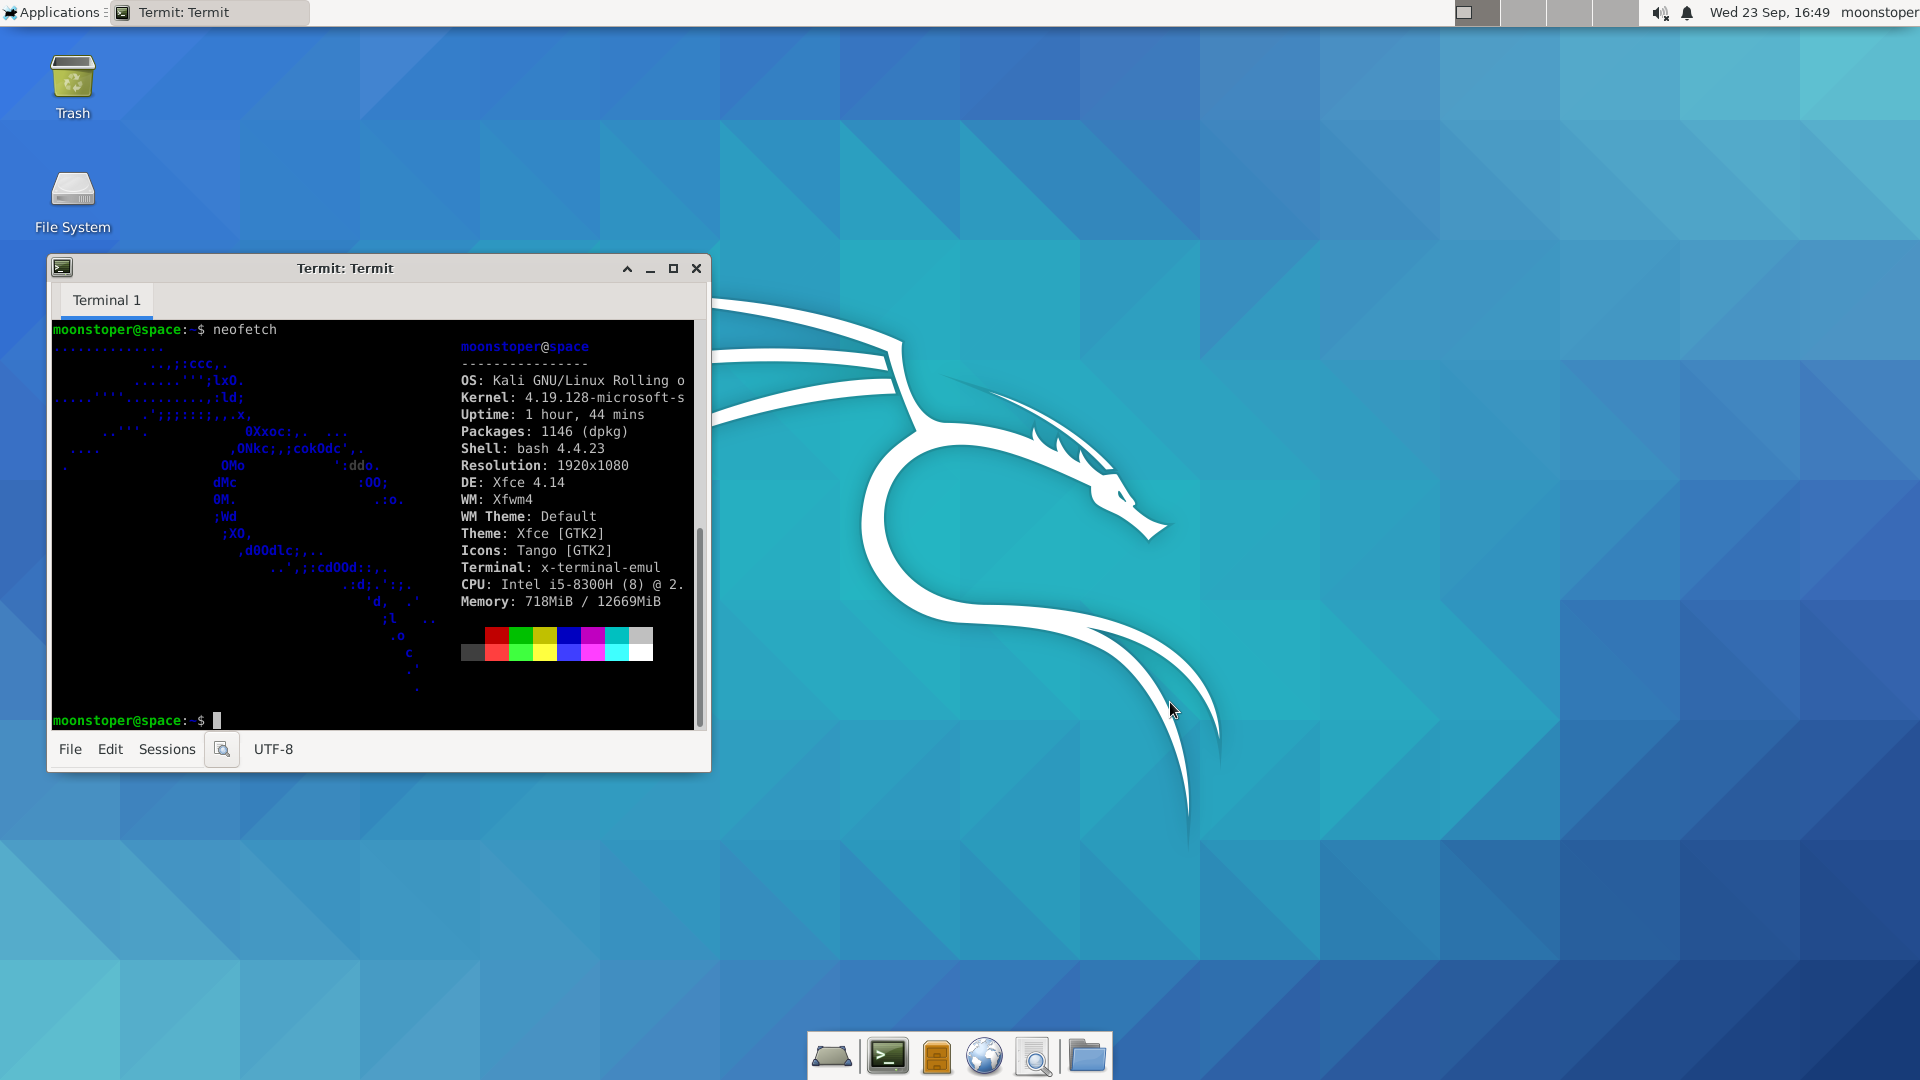
Method 2 is better than Method 1 because of performance issue and also you can launch individual program rather than entier environment.Also if you want you can use both methods simultaneously.
Extras
By default, Linux Ditro installs only in the drive where Windows is installed. Changing the App installed location from Settings doesn’t do anything.
You have to manually download appx package for your distro.
Extract in your preffered drive and click on .exe file to install.
You can launch Windows File Explorer from bash terminal without setting up for GUI. Just type the following command:
explorer.exe .
My Terminal Setup
- Hyper Terminal
- Dracula Theme
- ohmyzsh
- Hyper Startup Plugin
Feedback
Was this page helpful?
Glad to hear it! Please tell us how we can improve.
Sorry to hear that. Please tell us how we can improve.